ATS and RBD Rack / Pannier Systems: The Critical Details of Design
I've toured with Bob Beckman's Works of Art for 11 years now, through 20 different countries and almost every state...........they're worth every penny.
(Summit Magazine)
On all counts, they [Robert Beckman Designs] are the best packs around. Using these packs will spoil you."
(Outside Magazine)
(Summit Magazine)
On all counts, they [Robert Beckman Designs] are the best packs around. Using these packs will spoil you."
(Outside Magazine)
Within this section I've developed more than 20 pages of information that relate to what I consider to be the essence of design, and by far the most critical aspects of rack and pannier designs. These are the complimentary designs that ultimately influence the riding quality and handling characteristics of loaded touring bicycles. These designs, collectively, are what determine whether a loaded touring bicycle will reach its full potential in performance, relative to its relationship with the design of rack/pannier systems at this stage of their design evolution.
For 40 years, my exploration in the design of rack/pannier systems, and my innovations have all revolved around developing better ways to greatly enhance the performance of touring bicycles. Design has to have a direction and purpose, and the purpose of my work is to create high-performance bicycles through the components that I build. It's that simple. I'm on an extraordinarily different path than the other builders of racks and panniers. As you proceed through a presentation of mounting systems and compression/stabilizing systems, or of rack platform designs and integrated mounting systems, and all of the very wide range of other designs that I present, you will discover that none of these elements of design are found in any panniers sold through traditional bicycle stores and online retailers. None. Only one design feature is found in any racks sold through the same sources.
There are a multitude of reasons that RBD and ATS rack/panniers systems have been rated the finest in the world. Since that time they have simply gotten better and better as I've included many new innovations in my designs that have evolved from the development of the Hummingbird systems of racks and panniers. The gap between my racks and panniers, and all others, is much wider today.
In any great product it is its advanced overall design and a refined execution of its details that separates it from all others. In designing the gear that I build, the natural progression from highly evolved designs and excellence in execution, is to make the gear much more lightweight to develop higher levels of performance. And that is exactly what I've done during the past decade. First by creating new dimensions of performance in the extraordinarily lightweight Hummingbird systems and then by incorporating all their features in completely new custom, hybridized versions of my EL and Discovery pannier lines. There is even a wide gap in the performance within my own gear now compared to how much of it was being designed and built a half-dozen years ago.
Design is performance. The two are inextricably linked. And as my rack and pannier designs have moved forward, the performance of touring bicycles has moved forward, when these advanced products are used. At the same time, the performance of other panniers and racks just keep moving deeper and deeper into the past. Virtually all panniers sold today through bicycle stores and online retailers still reflect designs that are stuck, in almost every detail, in the first half of the 1970s. The evolution in rack designs, as part of rack/pannier systems, is similarly stunted.
I've dedicated a lot of space to design, because it is design and the ideas and experiences that developed it, that are the pathway to new opportunities to tour on a bicycle in easier, more efficient, and hopefully, more enjoyable ways.
Pannier Custom Four-Point Mounting Systems
Four-Point Mounting Systems
The bags fit to hand-built chrome-molybdenum racks. Nothing moves.........the last word in stability.
(Outside Magazine)
(Outside Magazine)
The most basic, fundamental foundation of performance in a rack/pannier
gear-carrying system is in the specific design of a rack that is aligned
with pannier design to develop a highly compatible mounting system. In
every pair of panniers that I sell I create a true, rack-specific
four-point pannier mounting system. A rigid four-point system provides a
strong, solid, movement-free foundation for carrying gear on a
bicycle. When I'm building panniers for racks that are poorly designed,
as most of them are, I modify the racks, through RBD Four-Point
Adapters, to upgrade the performance of the racks to an essential level.
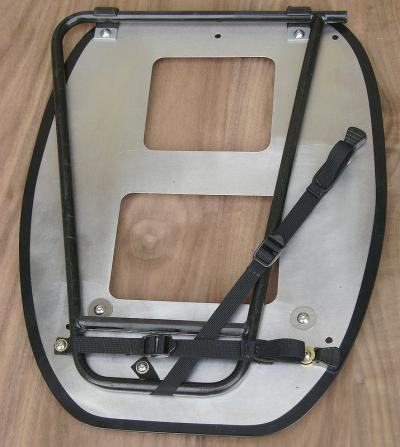
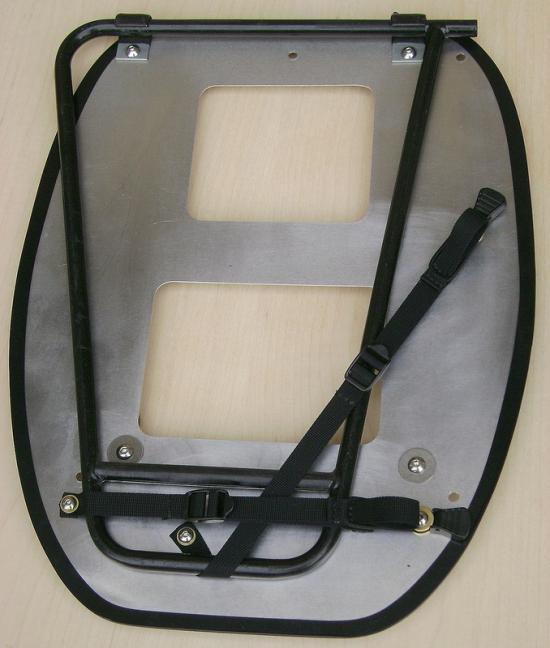
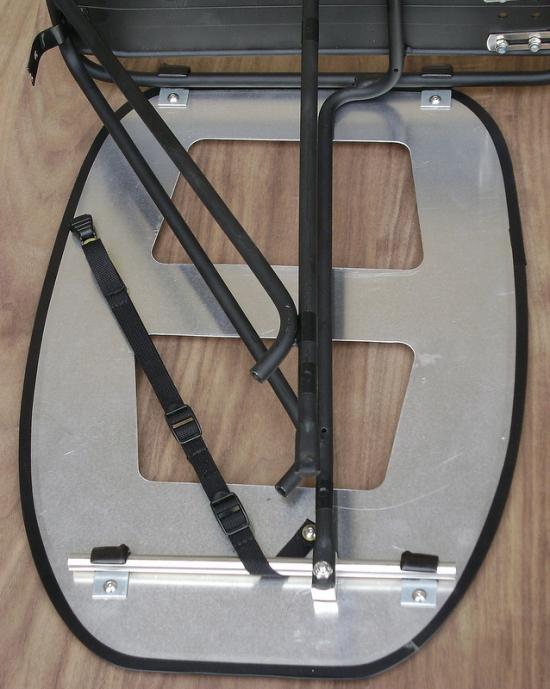
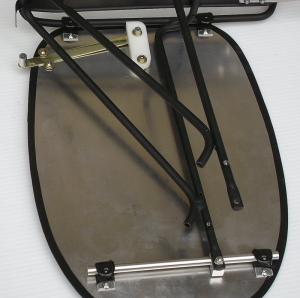
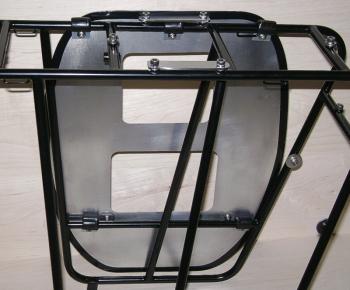
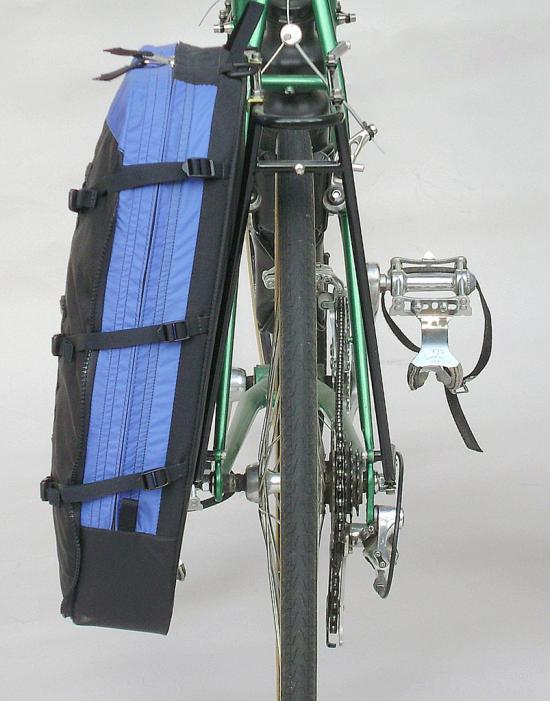
One of the early RBD four-point mounting systems developed in 1982 for Bruce Gordon racks. The two hooks at the top of the rack, and the two points at which the lower, horizontal mounting strap tightly crosses the rack tubing in the lower part of the rack, form four very rigid points of connection. This system has evolved through the years and is now available in a very lightweight version with 7/16" webbing.
Mounting systems fall into two basic categories, the two-point design
(Arkel, Ortlieb, Jandd, Lone Peak, etc.) and the four-point design (RBD,
ATS). The only three-point design that I have ever seen is in my
Hummingbird IFT Ultra-Lock Three-Point Design (there may also have been a
Mountain-Minded three-point design at one time). The effectiveness, or
lack of it, in each mounting system falls into two categories as well:
the first category includes panniers that hang loosely from the top of a
rack from two hooks (the two-point design) and are attached with a
bungee cord or other non-rigid device at the bottom of the panniers.
The second design is represented by panniers that may be locked tightly
to the rack in four very rigid points of connection (four-point
systems), with two at the top and two near the bottom of a pannier
(hooks or fasteners are always spread as widely as possible).
Two-point mounting designs function very inadequately as they do not provide stability or a solid foundation for a pannier. A two-point system will allow a pannier to wiggle and jiggle and shake and bounce, and will undermine the performance of compression systems and perimetric stiffeners or pannier supports. At their best, two-point systems will simply keep a pannier from falling off of a bike rack. Also, in ultra-lightweight panniers, a two-point system simply does not provide enough mounting-system strength, through its inherent movement. This is conducive to mounting plate failure, the need of substantial reinforcement of plates to minimize the potential for failure, or in the need for much heavier plates.
In contrast, four-point systems have a range of effectiveness from those that function well to those that function superbly. An effective mounting system that functions well is not simply one that is designed to hold a pair of panniers on a rack so that they won't fall off. There is a much higher expectation, and a higher level of potential of performance, and this higher level is developed in well-designed four- point systems. Such systems are designed to lock panniers very rigidly in place and to be a movement-free foundation of stability and strength to the pannier attached to it.
Mounting systems act as the foundation for carrying all of the gear on a touring bike. That is their function. It is their role in developing performance in touring bicycles. If a mounting system allows movement, it simply cannot provide a solid foundation. The lack of a solid foundation undermines the performance of all other design mechanisms that are used to solidify gear carried on a bicycle, or that is precisely distributed within panniers, to enhance the riding qualities of a loaded bicycle. If a mounting system is not rock-solid, it greatly diminishes the effectiveness of a compression/stabilizing systems, perimetric stiffeners or pannier load supports, and an gear-distribution design. If it moves it compromises the strength and durability of the plate or tubular frame to which it is attached. A system, like a two-point system, that merely holds a pair of panniers in place so that they won't fall off a rack, is kind of like a bicycle tire that only holds 20 pounds of air pressure. 20 pounds of pressure will provide some means to get you down the road, just not very well. (ATS, RBD PERFORMANCE ADVANTAGE)
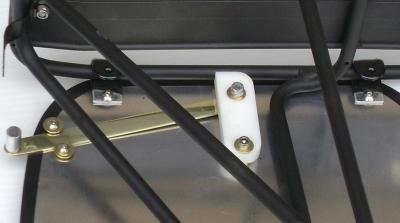
Hummingbird Ultra-Lock Four-Point Mounting System
In terms of on-the-bike performance, this is the king of mounting systems in many ways. It provides unparalleled rigidity and stability. In designing this system I simply transformed some ideas that are part of bicycle frame design into the design of the mounting system. As bicycles have evolved, each of the components which are attached to the bicycle's frame are secured in an extremely rigid manner, through a customized, application-specific design. For instance, a handlebar is held in place in a highly firm way by the clamp of a handlebar stem. The rear derailleur is screwed in place quite rigidly in a hanger that is integrally forged into the dropout of the frame. Wheels are held in place by specially designed cam-clamps in the quick-release skewers. All frame component attachments have a specialized design that maximizes stability and strength. There are no bungee cords used to hold handlebars or derailleurs in place. This is in direct contrast to poorly designed mounting systems which use bungees or other types of non-rigid fittings to hold panniers in place on a touring rack. In bicycles, there is no jury-rigging of components to bicycles frames as there is in the mounting of almost all panniers.
The Ultra-Lock system fasteners mount Hummingbird IFT panniers with extreme rigidity by attaching the aluminum internal frames of the panniers.
The adjustable brass fasteners of the panniers easily slide into place underneath the custom-made fittings brazed into Hummingbird racks, and are then tightened in place. They are as tightly connected as a handlebar is connected to a handlebar stem.
I followed the lead of bicycle component designers in creating the
Ultra-Lock Mounting System used in Hummingbird IFT panniers. The four
machined brass mounting fasteners that are attached to the pannier
internal frame, are firmly tightened in place to the rack when the panniers are
mounted to a rack. They are locked into position as firmly as a handlebar clamp holds a handlebar or a
quick-release skewer clamp holds a wheel in place. The tightness of the
connection is critical. It provides an extreme level of stability and
strength.
The pannier internal frames in the system are very, very lightweight. If the mounting system were not extraordinarily rigid, the internal frames would simply fail. But they don't, because they are carefully reinforced and their mounting mechanism is designed to maximize stability through eliminating movement. The .375 diameter aluminum tubing in the internal frames is nearly as rigid as 4130 Chrome-Moly steel rack tubing, and the combination of the aluminum frame and the rigid brass mounting fasteners creates a very strong design. Its an extraordinarily rigid mounting system, and it is designed in several variations for different types of Hummingbird IFT panniers, always in a way to maximize the spread of the top and bottom fasteners in their connection to a rack. The wider they are spaced, the greater the stability of the system. Top fasteners are spread as wide as 8.5 inches and the bottom as wide as 5.5 inches.
The internal frames of the panniers are much more rigid than aluminum plate stiffeners, so the spread of the fasteners may be reduced. When the internal frames are locked in place, their form becomes one with the rack, adding both rigidity and strength to the rack. Thus, a lot of weight and structure may be removed from a rack, which makes the Hummingbird racks both extremely rigid and extremely lightweight. Overall, the Hummingbird IFT pannier/racks systems are featherweight in relation to their level of performance, or another way to put it is that they have an extraordinarily high performance-to-weight ratio. (ATS PERFORMANCE ADVANTAGE)
Like all RBD and ATS panniers, the Hummingbird IFT models with the Ultra-Lock mounting design cannot be removed from a rack without a special tool. Thus, casual theft of a pannier isn't likely. But is it easy to mount and dismount a pannier with such a secure mounting system design? Absolutely. With a little practice you'll be able to mount or dismount the panniers in about 10 seconds in 14" pannier models. 18" models take a little longer.
RBD Dual Tension-Strap Four-Point Mounting System
The bags ride as if they are glued to the frame.
(Cyclist Magazine)
(Cyclist Magazine)
This unique type of four-point mounting system is still one of my
favorites. It has two mounting hooks at the top of the panniers, and
the horizontal strap near the bottom of the rack serves as the other two
points of rigid mounting in a four-point system. A couple of years
after this system was first designed, I replaced the horizontal strap
with two lower hooks in another very similar version for high-mount
front racks. It was then more obviously a four-point mounting system
but never quite as rigid as the original dual-strap four-point system.
I developed the dual-strap system in 1982 for Bruce Gordon racks after spending quite a few years working on creating a mounting system that would be ultra-stable, very reliable and that could be made from common materials requiring no custom hardware or fasteners. Within a short time it was described as the last word in stability in product reviews, and if it were not for other types of mounting systems that I later designed, it still would be the last word in stability.
I developed the dual-strap system in 1982 for Bruce Gordon racks after spending quite a few years working on creating a mounting system that would be ultra-stable, very reliable and that could be made from common materials requiring no custom hardware or fasteners. Within a short time it was described as the last word in stability in product reviews, and if it were not for other types of mounting systems that I later designed, it still would be the last word in stability.
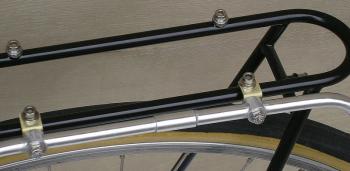
The RBD Dual-Strap Four-Point Mounting System, designed originally in a system with Bruce Gordon racks, has been adapted to many other types of low-mount racks. A very rigid, stable system.
I've adapted this mounting system to numerous low-mount racks with the
same ultra-stable results. Like all of my other gear, this system has
seen a lot of evolution through the years (most recently in 2011)
including losing half of its original weight through lighter,
more-specialized webbing and fasteners. The pannier mounting system is
very easy to use as panniers can be dismounted in a few seconds. (ATS, RBD PERFORMANCE ADVANTAGE)
Price: $75
Price: $75
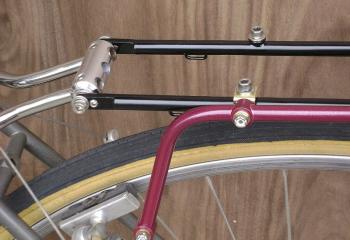
RBD Single Tension-Strap Four-Point Mounting System
In 1984 the design of the Gordon rear racks changed and I changed the mounting system of my panniers at the time to accommodate their evolution. The lower, horizontal strap in the dual tension-strap design was replaced by two hooks spaced as widely as possible. This is a simple, inexpensive and effective four-point system, but not quite as effective as the original two-strap design as the lower hooks are not as widely spaced (3.75") as the strap connective points (5.5").
The single tension-strap four-point system being used in conjunction with an RBD Four-Point Adapter. This extremely stable system is in a completely different world of performance when compared with the ineffective, unstable mounting systems found in virtually all panniers sold through bicycle stores and online retailers.
This very solid four-point system has evolved and has been improved
through the years. Its a system that has been adapted to virtually all
rear racks and many front racks. As it has been modified to fit almost
all racks, through the use of RBD Four-Point Adapters, its performance
potential has been significantly improved, which is especially critical
in building very lightweight panniers. With RBD adapters the lower hook
spacing may be as wide as 8.5 inches in some models of RBD and ATS
panniers on many different brands of touring racks. (ATS, RBD
PERFORMANCE ADVANTAGE)
Price: $45
Price: $45
RBD Cam-Lock Four-Point Mounting System
I've designed many different types of mounting systems with a cam design that is used in holding panniers tightly in place on various touring racks. The current RBD Cam-Lock design is a highly effective mechanism that is used in conjunction with RBD Four-Point adapters. The cam-lock/adapter system provides extremely wide hook spacing and tremendous stability, plus a degree of fore/aft pannier adjustment.
The RBD Cam-Lock system being used in conjunction with an RBD Four-Point Adapter: very wide upper and lower hook spacing and ultra-stability even of racks of a generic design.
A closer look at the system. Its polished brass and aluminum parts typify the vastly superior execution of RBD and ATS products as does its ultra-rigid performance.
The RBD cam-lock mechanism is unique among the cam locking designs that I've developed over the years in that it has a safety locking feature. There is a very small variation in the tightness of a cam-locking mechanism from rack to rack relative to variable thickness in the powder coating on racks. Also, over time a cam design will potentially become less tight: parts wear and flex, the vinyl coating on mounting hooks vary in thickness, and the coating wears and compresses through extensive use. Consequently, I developed a special locking mechanism that allows the cam to be locked in place so that it can never release (when you don't want it to) under any conditions. The locking mechanism also allows the panniers to be locked in place on a rack to eliminate the casual theft of panniers. Like all RBD designs, the Cam-Lock System functions at the highest level and is also crafted extremely well. (ATS, RBD PERFORMANCE ADVANTAGE)
Price: $195
RBD Pivot-Lock Four-Point Mounting System
In 1986 I started to build panniers that were dimensionally larger (taller, and wider) to provide greater carrying capacity while keeping the panniers as narrow as possible from the rack outward. In 1989 I started building tandem panniers that were built on even larger dimensions (18.25" by 13.5") for the same reasons. As the panniers increased dimensionally, their stiffening plates got much larger and needed more support, as well as much wider hook spacing, thus the racks they were mounted to also needed to evolve. They needed to get wider. They never did.
The Pivot-Mount system. A very simple, bombproof four-point system in which a highly polished stainless locking plate simultaneously locks five hooks tightly on to a rack.
A very clean looking system that is ultra stable. This system in used in matching some RBD panniers with ATS racks.
The Gordon racks for which I had built panniers almost exclusively for
more than a decade remained the same. So to develop higher levels of
performance I designed the RBD Pivot-Lock system to go along with my own
small line of Sakkit Touring Racks. The racks evolved significantly in
their design and craftsmanship and became RBD Touring Racks a few years
later, and their evolution continued. The RBD Pivot-Lock mounting
system has endured in its highly effective original form. It's simple,
its bombproof. It's ultra-stable. The top center pannier hook in the
system is locked into place by the Pivot-Lock mechanism, which in turn
pushes down on all of the other four hooks and locks them into place
when they are correctly adjusted. Hook spacing is very wide, up to 9.5"
between the top hooks and 8.5" on the bottom hooks, to provide extreme
stability. And, like several other RBD mounting systems, it's designed
to prevent casual theft of the panniers in that their removal requires a
special tool. It's a highly effective system that is used in many RBD
panniers. (RBD PERFORMANCE ADVANTAGE)
Price: $85
Price: $85
RBD Four-Point Adapters Designed for Non-ATS Racks
The overall stability of the panniers [Robert Beckman Designs] is superb.
(Summit Magazine)
(Summit Magazine)
Most touring racks are designed very poorly in terms of their
gear-carrying potential in a rack/pannier system. They are designed in a
way that panniers may only be loosely hung from the top platform of the
rack (a two-point mounting system). Virtually no racks outside of ATS
racks were designed to accommodate four-point pannier mounting in a very
specific manner. Even the Gordon racks, for which I stated building
panniers in the 1970's, were designed for two-point pannier mounting. I
created four-point systems for the Gordon racks and greatly changed
their potential. And I have taken a similar approach to a few other
types of racks. But most racks simply need to be modified to function
well and to carry gear in a highly effective way. This is especially
true when racks are matched with ultra-lightweight panniers. To ensure
the durability of mounting systems in ultra-lightweight panniers, they
must have an ultra-stable mounting system. Consequently, a very rigid
four-point mounting system is required to eliminate movement in pannier
mounting. In most racks for which I custom-build panniers, a high
level of stability is accomplished through modification and the use of
RBD Four-Point Adapters.
A very inexpensive rack that was very poorly designed in every way. As it was designed, panniers may be mounted to it with only the lowest measure of stability. With the addition of the RBD Four-Point Adapter, and a RBD Single Tension-Strap Four-Point Mounting System, its gear-carrying potential in a rack/pannier system is completely transformed. With the inclusion of the adapter in its design it moves into a totally different realm of pannier-mounting stability.
The RBD Adapters were designed to greatly alter the performance
potential of racks. Even an inexpensive rack of a generic design, that
was never meant to function well in any way, can be transformed into a
rack that will performance well. The rack in the photo is a basic,
inexpensive rack that is not designed to do anything well. I don't even
know what type it is. It didn't cost more than $30, but with an RBD
Four-Point Adapter and Single Tension-Strap mounting system, a totally
different world of potential of extreme pannier mounting stability is
opened up. RBD and ATS panniers can now be mounted to such racks in an
ultra-stable way. This is an inexpensive gateway to high-performance
touring. (ATS, RBD PERFORMANCE ADVANTAGE)
Price: $65 per pair
Price: $65 per pair
Pannier Compression Systems and Support Designs
Highly Effective Compression / Stabilizing Systems
Pannier mounting systems are the foundation of stability and the foundation of performance in carrying gear on a touring bicycle. They are critical, but they are still just the foundation. They don't keep gear inside panniers from shaking or bouncing, as compression/stabilizing systems perform this basic function. Compression systems are what is built upon the foundation of pannier mounting systems, to increase the performance of your gear-carrying system's effectiveness in neutralizing its impact on a touring bike. The more stable your compression system is, the better your touring bike performs. When compression/stabilizing systems are designed well, they are used to cinch the gear inside panniers closer to the rack and the lateral center-line of the bike. Cinched tightly, they not only move loaded gear much closer to the rack, they compress it tightly so that it doesn't move independently of the rack or bicycle. It becomes a solid part of the bicycle, opposed to something that can wiggle and jiggle and bounce independently.
A dual-strap compression system on a very narrow pannier. In ATS Hummingbird panniers, like these that weigh 21 ounces per pair, the compression straps work in conjunction with HDPE twin-wall load supports and extremely stable mounting systems, to provide an extremely high level of gear-carrying potential.
Large panniers in particular, like these Discovery Northern Lights panniers in a tandem version, absolutely must have a triple-compression system to function well. Compression/stabilizing systems are for all types of touring. On glassy-smooth pavement they cinch gear carried in panniers inward much closer to the rack. The primary function of panniers is to carry gear well and to neutralize its impact on the riding quality of a bicycle. Panniers cannot perform this elemental function without highly effective compression.
The best way to see just how important stabilizing systems are is to use one that performs really well. Learn how to use it in all of its subtleties and to its greatest advantage. And then take it away. Then you'll see just how significant its impact is. Highly stable compression systems make a big difference in the performance of a touring bicycle. Moving touring gear inside panniers much closer to the center-line of a bike and holding it tightly in place simply does very good things to the handling qualities of gear-carrying bicycles.
In RBD and ATS panniers the compression systems are carefully designed to provide the best performance advantage. A lot of work goes into the design of the systems. In the triple-strap design used in the Discovery Series models, there are 48 fasteners, 36 pieces of webbing, 10 fabric reinforcement pieces and over 300 separate production steps used in cutting reinforcements, cutting webbing, sewing and assembling the systems on the panniers. There are more separate work steps just in the compression systems of some RBD panniers than the total amount of steps required to build the complete panniers in many types and brands of panniers.
The Discovery Series triple-strap systems are very cleanly executed, and they may look simple, but they are very complex in their detailing and design. As a result they're impressive in how they can hold gear within the panniers very tightly in place. Both dual and triple-strap designs are used in all RBD and ATS panniers. To be effective, each strap in the system wraps the whole pannier, completely around all pockets and compartments. A full wrap is critical. Because all RBD and ATS panniers have front-loading designs with long entry zippers, each strap has a quick-release fastener so that the straps don't interfere with loading and unloading the panniers. To provide the best potential to cinch a pannier load very tightly, all of the straps in a system are adjustable at both ends. And, like all elements in the design of RBD and ATS panniers, the compression/stabilizing systems have evolved, they've improved. Each system is now available with ¾" straps and fasteners, or at less than half the weight, in 7/16" webbing straps and easy-to-use 5/8" side-release buckles. (ATS, RBD PERFORMANCE ADVANTAGE)
Polyethylene Perimetric Stiffeners
Perimetric stiffeners are thin (.030), rigid, high-density polyethylene (HDPE) stiffeners that are designed to, when inserted into the panniers at a right angle to the rear aluminum stiffening plate, significantly increase the rigidity and support of the panniers. The stability and load-carrying potential of the panniers is greatly enhanced through the supportive rigidity that they provide. They keep the panniers from sagging and help maintain the pannier's form under a load. The poly stiffeners are difficult to show in a photo as they are slid into sleeves inside the panniers at the bottom where the pannier's zippers do not extend, and also between the pannier zippers and the rear aluminum stiffening plate. They are a very important part of a design that creates the highest levels of stability and load-carrying potential, and have been part of the RBD pannier design since 1976. (ATS, RBD PERFORMANCE ADVANTAGE)
Pannier Gear-Loading Designs
A Design of Optimal Pannier Dimensions
It is very important that panniers always be as narrow as possible. A load on a touring bicycle should be carried as close the lateral center-line of the bicycle as it can be placed. You don't want panniers to be sticking outward from the rack any further than they need to. To keep RBD and ATS panniers as narrow as possible, both to optimize stability and the handling characteristics of a touring bike, and to reduce wind resistance, each model is offered in three different dimensional sizes: a 14" (vertical) version as well as 16"- and 18" options. The taller each model is built, the more narrow it may be designed relative to its overall carrying capacity and size. For instance, an RBD Discovery Expedition model will be much narrower in an 18" version of the pannier than a 14" one. A 14" version might be used on a low-mount front rack to provide enough pannier clearance above a riding surface, but an 18" version will be used whenever possible. An 18" version of the Expedition would be used as the optimum choice on a rear rack, and both the rack and the panniers would be specially modified so that the panniers would clear the rear derailleur under the right-hand pannier
In terms of their carrying capacity, these Discovery Series panniers are large, but they are also very narrow because they are 18.25" tall and 13.5" wide, from front to back. Panniers that are built in three different vertical sizes allows them to be as narrow as possible.
Each pannier version (14.25", 16.25", 18.25") is also made wider (fore/aft) with
each successive vertical increase in size, to again. make it narrower
from the rack outward. Keeping panniers as narrow as possible is a very
important, fundamental part of pannier design. (ATS, RBD
PERFORMANCE ADVANTAGE)
Optimal Gear-Loading Design (Steps One Through Five)
There are many elements of design that define how well a touring bike will handle, and that add up in the overall equation in determining how well it may ultimately perform in terms of its overall riding qualities. I've already mentioned stability and how it may greatly be increased through design: mounting systems, compression systems and parametric stiffening. Stability is a key factor in defining the handling characteristics of a bike under a touring load. The other key factor is load distribution. The impact that an advanced gear-loading design can have on the handling performance of a touring bicycle is significant. All RBD and ATS panniers have a very unique loading design that allows touring gear to be very precisely distributed within the panniers and on a bike. Gear may be positioned by weight and density within the panniers vertically, laterally (from the rack outward) and in a fore/aft orientation on a bike. The loading and gear- distribution design was developed to optimize the placement of gear on a bicycle to provide much better handling characteristics. It's the second part of a five-step process that has a important impact on the performance of a touring bicycle. (I should note that the critical designs that I'm about to describe, and that ultimately have a very critical role in how well in how touring racks, panniers and bicycles perform, are not found in products sold through bicycle stores and online retailers.)
STEP ONE. LATERAL PLACEMENT OF GEAR- It is wise to load a touring bicycle from the rack(s) outward. The narrower the racks are, the better. And the optimum placement of gear on bikes is also in the narrowest position. To optimize gear placement within the panniers that I build I design the inside compartments (those next to the aluminum stiffening plates or internal frames) of panniers to be as narrow as possible. Front panniers have an inner compartment as narrow as 2 in. deep and rear panniers are as narrow as 3 in. deep from the rack outward. Making the panniers narrow ensures that the heaviest and most dense touring gear can be loaded very close to the racks. Gear that is less dense and lighter will be loaded in pockets and compartments that are further away from the racks. As a gear designer, I can optimize the depth of compartments by designing panniers to be taller from top top bottom (18") and wider from front to back (14"), and I do. Experience has taught me that placing gear as closely to the lateral center-line of a bicycle is an essential part of loading a bicycle well.
The more weight that you carry on a bicycle in each pannier and the rougher riding conditions get, the more critical weight distribution becomes. This is especially true for tandem tourists and riders that spend time touring in rough-riding conditions (on dirt). Panniers designs that allow the placement of heavy gear items to be only an inch or two from a touring rack represent a huge bonus in performance.
On the note of fine details, there is only one item amongst all of my touring gear that I have to be concerned about relative to pannier depth, and that is my cooking pot. Even though it's more than four inches in depth, a pannier compartment three inches deep easily accommodate it. So, in rear panniers, the minimum depth is a standard of three inches. (ATS,RBD PERFORMANCE ADVANTAGE)
STEP TWO: VERTICAL PLACEMENT OF GEAR- Most bicycle tourists have heard that placing gear low on a touring bike is a good idea. And it is. As a bicycle tourist I've seen a lot of emphasis being placed on keeping gear low. The reason that there has been so much emphasis that is placed on low-mount front panniers, and keeping gear low on a touring bike, is very simple. Within the industry of manufacturers and bike stores that produce or sell touring equipment, the only design feature that they have to sell that relates to gear loading and performance, is in a rack or panniers that can be mounted low on a bike. That's it. The products that they make or sell don't have effective mounting systems or compression systems, and their products don't have perimetric support or specialized gear-loading designs, so all of the focus is placed on low mounting. Consequently, retailers sell what they have to sell. They focus on the only thing that they can focus upon, and that is keeping gear low.
As a designer working independently of the bicycle industry, I don't focus upon placing gear low nearly as much as other manufacturers. That's because my designs are far more comprehensive. I focus on five very important elements of design, not just a single one. But when it comes to placing gear low, my focus through design, is far more thorough. Since the mid-1970's I've always designed panniers so that they have to be loaded from the bottom upward, and have been especially careful in how I design all pannier pockets and compartments to optimize the vertical placement of gear within panniers. I design each pannier pocket and compartment so that all of the gear that is packed into them has to rest on the very bottom of the panniers. And, of course, I stress putting the heaviest and most dense gear on the very bottom. But there's much more to it still. In all RBD panniers each compartment or pocket is rigidly supported at the bottom and sides by a perimetric stiffener. In addition to this important support, as my RBD panniers may be cinched very tightly with a compression strap near the bottom of the pannier, at its mid-point, and also near the top, the gear in each compartment may be fully controlled by a compression system. So, not only do I ensure through design that gear can be mounted as low as possible inside the panniers, I also ensure that it can be tightly controlled from moving independently of the bicycle.
In the bicycle industry there is a lot of attention given to low-mount front racks. The attention is on where to place gear, but not how, because the panniers promoted and sold within the industry only address where, and in where, only in one direction: low. Very few of the panniers have any kind of compression and none have effective mounting systems. So the suggestion has always been that if gear is packed low that that is all there is to it, and that all potential bicycle handling problems are solved and over. They're not, not by a long shot. The emphasis needs to be on 'how.' How stable is gear when it is mounted low? How far away from the rack and lateral center-line of a bike is gear when it is mounted low? How well is gear located in a fore/aft position on racks and a touring bike when it is placed low? How rigid is the unsupported section of a touring rack below the bicycle hub? Merely placing gear lower on a bike doesn't do much in itself. It actually does very little when not augmented by complimentary designs. (RBD, ATS PERFORMANCE ADVANTAGE)

Rear pannier loading always starts in the narrow, forward, inside compartment of the panniers. At the bottom of this compartment heavy, dense items are placed. This is were stove fuel, water and other liquids, tools, canned goods and other types of heavy gear goes.
Much lighter-weight gear is then placed in compartment no. 2, in the aft side of rear panniers, next to the rack. By being conscious of the weight and densities of touring gear, you can load it so that it has much less impact upon the riding and handling qualities of your touring bicycle. And the more you learn about, and become familiar with a range of pannier designs, the more you will understand just how ineffectively designed, and extremely limited in their function, panniers sold through retailers actually are.
STEP THREE: FORE/AFT PLACEMENT OF GEAR- Perhaps the easiest way to
describe how important the fore/aft placement of gear is on a bicycle,
at least for a start, is to look at a rear rack and panniers. A rear
rack is connected to the seat stays of a bicycle, usually in two spots.
The first is at the dropouts by means of a set of threaded eyelets
forged into the dropouts to which the rack is attached. The second
location of a rack connection is on the seat stays about 12 or 14 inches
above the lower attachment point. From these two points the rear rack
is screwed in place and is cantilevered backward over the rear wheel of
the bike. In the word 'cantilever' is the word lever. In effect, a
rear rack and loaded panniers are part of a long lever attached to the
seat stays of a touring bicycle. And when a lot of weight is attached
to this lever it has a pronounced impact upon how a bicycle handles
under a load. When you load touring gear in panniers and on a rack
improperly (too far to the rear), the impact of the long lever is
magnified. You'll feel it in frame flex and poor bicycle handling
characteristics. You might describe how it feels as the tail wagging
the dog: weight at the rear of the bicycle negatively influencing
everything in front of it.
In my own experience, through long-distance bicycle touring in a lot of different conditions, and through extensive experimenting with carrying gear in rear panniers, I've learned a lot about the impact that this long lever has on rear panniers and upon the riding qualities of a touring bicycle. Consequently, when I first started designing panniers I wanted to counteract this negative influence, and I was successful through creating a better way of designing panniers. I did so by vertically bisecting each of the compartments in my panniers. Originally, in the design of each pannier there was a forward half and a rear half. And in succeeding years I altered the design to both a 33/67 and 40/60 compartmental design, fore and aft. In loading my panniers, into the bottom forward-third or half-space, I concentrate on putting my heaviest, most-dense gear: tools, canned foods and other food items, liquids (stove fuel or water) and other types of gear that weighs a bunch but doesn't take up much space. My focus has always been on keeping heavy items at the correct end (forward) of the lever. So not only do I load panniers from the rack outward, I also load rear panniers from front to rear on the bicycle.
When I'm carrying extra water on a bicycle, as in back country touring, it goes in the forward 1/3rd space in the rear panniers, closest to my heels, and close to the rack. This has a very positive impact on carrying heavy loads. It's important, in loading touring gear, to recognize which gear is heaviest and most dense and to place gear into the panniers in its optimum positions to create the best bicycle handling performance. I think that it's easiest to explain how both fore/aft and lateral optimum loading is executed through showing it in photos. I'll take a few photos that will illustrate how the system works. I concentrate on loading panniers systematically starting in the no. 1 position, and then move to the no.2 position and so on.
On the front end of a bicycle things are different. The fore/aft compartmental design that I use is instrumental in counteracting frame shimmy on a touring bike should it ever occur. There is an optimum fore/aft load-carrying position on any bicycle that includes both front and rear panniers and the rider on the bicycle. Deviate from this optimum orientation too far (it doesn't take much) and a touring bicycle can experience frame shimmy. There are a number of potential sources of frame shimmy, but most often its improper loading that causes shimmy (if you ride your bike unloaded and there is no shimmy, and then load it and it occurs, the chances are good, but not entirely so, that it is the load causing shimming). Moving gear inside front panniers to the most desirable fore/aft position is one important instrument in counteracting shimmy. Cinching it tightly is helpful as well. (ATS, RBD PERFORMANCE ADVANTAGE)
STEP FOUR: PANNIER PLACEMENT AND LOAD CONTROL- Once panniers are loaded, everything within them has to be controlled so that the panniers and gear can't move independently of the bicycle, and they have to be placed on racks in an optimum position. As I've mentioned, load control is a function of advanced four-point mounting systems, highly effective compression systems, parametric stiffeners or supports and other design features that together keep panniers and gear from moving. Load control is important, and optimum placement of gear inside panniers is critical, but there's more to the equation of performance. There is an optimum placement of panniers on racks as well, and this is accomplished in RBD and ATS panniers through the design of mounting systems that allow for fore/aft pannier adjustment on racks, like the RBD Pivotmount system and RBD Cam-Lock mounting system. RBD and ATS panniers are also adjusted in terms of fore/aft placement on ATS racks through rack design. All ATS racks are made in custom fore/aft mounting positions, with three possible positions for front racks and four in rear racks. Fine tuning the placement of racks is important in load carrying performance and also, in rear racks, in providing proper heel clearance on all bicycles. (RBD, ATS PERFORMANCE ADVANTAGE)
STEP FIVE: RACK DESIGN (FLARE) IN OPTIMAL GEAR LOADING- The design of touring racks also plays a key role in the optimum placement of touring loads in several ways. Many ATS racks are designed to be as narrow as possible. A narrow rack is complimentary to panniers that are also designed to be as narrow as they can be in keeping touring loads close to the lateral center-line of a bicycle. The very narrow platforms (a width of 2.75") of rear ATS Hummingbird racks places gear right where it needs to be, close to the bicycle's wheel, for a higher level of performance.
Almost all racks, other than ATS racks, are designed with sides that are perfectly vertical, which creates a couple of problems. One is that the top platform of a rack is much wider and heavier than it needs to be. And the other is that panniers, if they are vertically long, protrude directly into the quick-release skewers of the hub, or the rear derailleur of a bicycle, as the bottom of the racks is not properly flared outwardly. To overcome these problems, ATS racks are designed with vertical sides sloping at an outward angle, thus their sides are flared. The flare in the sides of ATS racks is as high as ten degrees, which allows the use of very long pannier designs that clear both quick-release skewers and a rear derailleur. Through this design rear RBD and ATS can be designed to be very long and narrow. (ATS, RBD PERFORMANCE ADVANTAG
Unique Pannier Construction and Weight
Lightweight, Multi-Fabric Pannier Design and Construction
For decades 500-denier Cordura nylon has been the fabric of choice used in the construction of zillions of backpacks and bicycle panniers. I'm sure that to note its use, because it is a durable fabric, is great in the marketing of panniers, but its exclusive use in their design, because it is so unnecessarily heavy, undermines the overall performance of a touring bicycle. Pounds can be eliminated from a touring bike through the construction of panniers using design, opposed to heavyweight fabrics in their construction, to ensure the level of durability that is required in the design of panniers.
A good measure of essential durability is an around-the-world bicycle trip. I think that if a pair of panniers holds up well in an encircling of the globe, then that's quite acceptable. Hummingbird IFT panniers weigh as little as a 18 ounces per pair and I wouldn't think twice about using them on a multiple-year trip around the world. They are quite durable, and it's not because of any type of heavyweight fabric. It all gets down to design. Instead of using a single type of heavy fabric to provide long-term durability, five different fabrics are utilized in their construction, with very small pieces of heavyweight fabrics only used in high-stress areas of panniers as a reinforcement.
A good measure of essential durability is an around-the-world bicycle trip. I think that if a pair of panniers holds up well in an encircling of the globe, then that's quite acceptable. Hummingbird IFT panniers weigh as little as a 18 ounces per pair and I wouldn't think twice about using them on a multiple-year trip around the world. They are quite durable, and it's not because of any type of heavyweight fabric. It all gets down to design. Instead of using a single type of heavy fabric to provide long-term durability, five different fabrics are utilized in their construction, with very small pieces of heavyweight fabrics only used in high-stress areas of panniers as a reinforcement.
Under the carrying handle the fabric is in three layers. Only areas of very high stress, or in which there needs to be above-normal abrasion resistance, do heavier fabrics benefit performance. Many types of gear that we use are made of very lightweight fabrics, and they hold up well for decades of hard use (tents, parkas, sleeping bags etc.).
The primary fabric used in Hummingbird IFT panniers is 2.4
urethane-coated Ripstop nylon, commonly used in the floors of tents and
about twice the weight of Ripstop used in many sleeping bags and
jackets. All interior fabric pieces of the panniers are of 1.4 oz.
silicone-impregnated Ripstop. Pannier bottoms, where the greatest
load-bearing stress is, are of 3.4 oz. 200 denier Oxford nylon which is
reinforced with 7.5 oz. 500 denier Cordura. Load-bearing stress is
reduced through keeping bottoms small and through a 10-degree cant in
their design. The greatest stress, by far, in the panniers is under the
carrying handles. 7.5 oz. 500 denier Cordura is used as an essential
reinforcement in this location, where there are three layers of fabric.
The backs of the panniers, where the fabric is stretched like a drum
skin over the aluminum internal frames, is constructed of 4.4 oz.
laminate-coated Oxford. It's chosen for durability, the fact that it's
stable (low stretch) when wet and because it is extremely waterproof.
Added up, the combination of fabrics will be about 1/4th that used in
panniers constructed of 1000 denier Cordura and a similar ratio when
compared with heavyweight dry bag-type panniers.
Many types of gear including tents, sleeping bags, rain wear, parkas, stuff sacks, and even dry bags for canoeing and kayaking are constructed completely of extremely lightweight fabrics like 1.1 oz. or 1.4 oz. Ripstop nylons. ATS Hummingbird IFT and RP panniers, and all hybridized versions of RBD pannier models utilizing lightweight fabrics can be used very successfully when their Care and Use Instructions are followed. Panniers absolutely do not have to be heavyweight to be quite durable for a lifetime of trouble-free use.
I've noticed (it would be hard miss it), not so much by building gear, but on my short waltz through life, that a certain percentage of people, albeit a very small number, are biologically predisposed to destructive tendencies. Through no special education or endeavor some folks are just a whole lot better at wrecking things than others. Of course, this is rarely seen as a genetic impediment or functional disability on the part of those individuals. In many cases this purely Darwinian attribute is channeled, as a useful mechanism of natural selection, where it can work its magic best, and many such biologically imbued individuals end up having monstrous success in, among other pursuits, the world of politics. Such inclinations may be useful in directing imperial expansion into new world-labor markets or be seen as a biological imperative in nation building, but a pronounced ability to destroy stuff doesn't neatly blend into other areas of life.
If you find yourself thinking that your panniers would be more useful if they doubled as a soccer ball around camp, or if you sense a unique magnetic pull from, and desire to blast into, every curb and bridge abutment along roadways, it might be best that 500-denier Cordura be used as the primary fabric in the construction of your panniers. You don't have to completely abandon the advantages of five-fabric construction but you might be best served by not going too light. For everyone else, go as lightweight as you possibly can and if you bang up your gear a little or see some wear starting to develop through years of use, pull out the Aqua Seal and use it as a reinforcement. Aqua Seal is extraordinarily tough. It's many times tougher than the 500-denier Cordura that may be used as the primary fabric in the construction of your panniers. But I'd encourage you to use an intermediate weight fabric as the primary one. One the whole, go light and enjoy the weight savings that a multi-fabric design provides in making your touring bike a bit more easy to ride. (ATS, RBD PERFORMANCE ADVANTAGE)
Internal Frames and Relieved-Plate (RP) Stiffeners
Aluminum Dial- and Triple-Relieved Plate Stiffeners in 3 Sizes
At first glance, the type of stiffeners used in panniers might not seem important, but the material from which they are made, combined with their design, can have a significant influence upon the performance of a touring bike. In a touring bike set up with front and rear panniers, well-designed aluminum stiffeners can shave two pounds from the weight of a the bike. Two pounds is an extraordinary amount of weight reduction in any one type of bicycle component. Just think about it a bit: how much more might it cost to purchase a touring bicycle frame that is two pounds lighter than all others? There can be a lot of dollars spent in reducing a frame by two pounds. But two pounds is a typical reduction in weight between relieved aluminum plates and plastic ones that are not relieved. In the photo the middle stiffener is a 16-inch plate. It weighs 168 grams (5.9 ounces). The same plate in Polycarbonate plastic, but not relieved, weighs 386 grams (13.6 ounces). That's a huge difference in weight in one touring bicycle component. When multiplied by four that's a difference of 872 grams, or 30.7 ounces of totally useless weight. In terms of useless weight you can look like it as, instead of having just one front derailleur on a touring bike, it all of a sudden has eight (and each is clamped at the ends of a bike instead of the middle). Stuff adds up.

A dual-relieved aluminum-plate stiffener that is used with a four-point mounting system. The stiffener design reflects a good combination of rigidity, a solid anchor for compression systems. relatively low weight and solid strength to support four-point mounting systems.
Many types of plastic stiffeners will break quite easily under normal
touring conditions. Both ABS and Polycarbonate stiffeners fracture at
stress points where mounting system hardware is attached. HDPE and
Nylon stiffeners hold up much better, but have to be made quite thick to
have a similar level of stiffness compared with aluminum plates.
Aluminum plate stiffeners will also fail unless the mounting systems
attached to the plates are very stable. Four-point mounting systems
provide the stability to be compatible with aluminum plates. In a
relieved-plate design the stiffeners lose some stiffness. In ATS
Hummingbird RP panniers the rigidity that is reduced in relieving the
plates is counteracted through four-point mounting systems with very
wide hook spacing. The unique design of the systems ensures that
relieved-plate stiffeners, although they are very lightweight, have the
required stiffness to support both mounting and compression systems.
Currently, ATS and RBD relieved-plate stiffeners will have two or three
relief holes die-cut into the stiffeners depending upon the length of
panniers and the type of rack to which the panniers are mounted.
All RBD and ATS aluminum pannier stiffeners are available in three sizes: 14", 16", and 18" lengths. The rule of thumb is that the longer the better, as a longer pannier will also be a thinner one. But longer is not always possible especially on some front low-mount racks in which ground clearance issues come into play. (ATS, RBD PERFORMANCE ADVANTAGE)
All RBD and ATS aluminum pannier stiffeners are available in three sizes: 14", 16", and 18" lengths. The rule of thumb is that the longer the better, as a longer pannier will also be a thinner one. But longer is not always possible especially on some front low-mount racks in which ground clearance issues come into play. (ATS, RBD PERFORMANCE ADVANTAGE)
Aluminum Internal Frames (IFT), Hardware and Rack Structure
Beckman's materials are simply the best
(Southwest Cycling Magazine)
(Southwest Cycling Magazine)
Relieved aluminum plates are very lightweight, but aluminum internal
frames are much lighter still and much more rigid. An 18-inch relieved
aluminum plate tips the scales at 203 grams (7.3 oz.), which is very
little, but an 18" aluminum internal frame weighs in at only 89 grams
(3.1 oz.) yet is dimensionally wider and is nearly as rigid as the rack
to which it will be attached. At 3.1 ounces it's less than 1/5th the
weight of a plastic stiffener, but much more rigid and a much better
anchor for any compression/stabilizing system. However, it's not just
the design of the internal frame that is so impressive, there is also
the design of the hardware for the mounting system to consider. It is
also extraordinarily lightweight. The custom-made brass fasteners that
are part of the Ultra-Lock mounting system used to mount the internal
frames to Hummingbird IFT racks weigh only 1/7th the weight of the
original pannier hooks used in RBD mounting systems. The fasteners are
featherweight, but their real advantage in performance is in how tightly
they attach the Hummingbird panniers to the Hummingbird racks . Each
brass fastener, when mounted, is secured as rigidly as a handlebar is
secured in a handlebar stem, which provides tremendous strength in the
system.
The brass fastener on the right functions much better than any pannier hook, yet weighs 1/7th the amount of the original RBD hook that was first made in 1982.

Revolutionary design: reinforced tubular-aluminum pannier frames. A key ATS design component, among dozens, that work in complimentary ways to advance bicycle touring products into a completely different dimension.
By themselves the internal frames and all of the hardware that make up
the Ultra-Lock mounting system are extremely lightweight, but their
weight savings as components of a touring bicycle, go further. When the
internal frames are rigidly attached to a Hummingbird rack, they become
part of the rack. Their structure is utilized in the racks in such a
way that much rack tubing may be eliminated, greatly reducing the weight
of the racks as well. Through the unique design of the internal frames
the panniers give structure and stability to the racks and the racks
give structure and stability to the panniers. This symbiotic design is
what allows all Hummingbird IFT pannier/rack systems to be
extraordinarily lightweight and to enhance the performance potential of
any touring bicycle. (ATS PERFORMANCE ADVANTAGE)
Integrated Pannier Mounting and Custom Fasteners
Integrated Rack / Pannier Mounts
In each side of every ATS Hummingbird IFT rack are four specially designed custom-made fasteners that are brazed into the rack. Screwed into each fastener is another custom-designed stainless steel fastener that forms a rigid clamp to lock the custom-machined brass fasteners of the internal frames of panniers into place. This combination of three types of complimentary fasteners forms the Ultra-Lock mounting system. The integrated rack fasteners are the unique rack feature that are the foundation in making the whole pannier mounting system work. They are its foundation. Without them ATS Hummingbird racks are, in one way just another ordinary rack, a collection of tubes without purpose. With them they are extraordinarily lightweight racks that provide superb pannier stability. ATS Hummingbird IFT racks are an example of performance through innovative design. It's a design that can significantly alter the weight of touring bikes, through great reductions in rack and pannier weight, and positively alter the handling characteristics of bikes as well. It's kind of amazing what a few grams of design (in three types of custom-made fasteners) can do.
(ATS PERFORMANCE ADVANTAGE)
(ATS PERFORMANCE ADVANTAGE)

Integrated Pivot-Lock Four-Point Mounting System
When I received a call from a customer of mine who had just had his panniers stolen from his bicycle in Nepal, I decided that I would one day develop a mounting system for panniers that would both create a high level of stability and that would also lock panniers to a rack to prevent casual theft. The Pivot-Lock design is that system (since that time I've designed two more systems). It's a four-point mounting system with extremely wide hook spacing (up to 9.5" at the top and to 7.75" at the bottom) and extreme stability. It is also a mounting mechanism that creates a small amount of fore/aft pannier adjustment to provide better heal clearance in rear panniers. The mounting system is very easy to use. Panniers mount and dismount quickly and easily in seconds. When panniers are mounted into position, the stainless steel locking mechanism is moved over the top middle pannier hook and locked into position with a couple turns of a screw. A special socket key is used to turn the screw. Without this key panniers cannot be removed. It's a simple means to prevent casual theft of panniers while at the same time locking panniers so tightly to a rack they are movement free. It's a simple, bombproof system available in RBD and ATS racks. (PERFORMANCE ADVANTAGE)

Pannier Mounting System Hooks and Fasteners
Whether pannier hooks are made of aluminum, plastic, stainless steel, galvanized steel or brass is of little relevance. But their design, in relation to the material in which they are made, can have an impact in the performance of panniers and in the performance of a touring bike. How a hook or fastener is designed can play a role in determining pannier stability and durability, and may be conducive to some significant weight reduction in panniers.
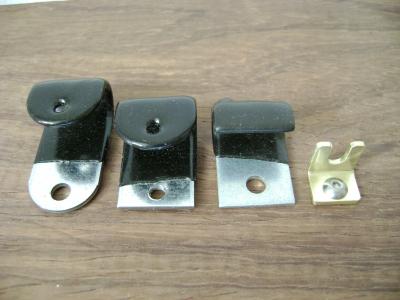
I design hooks and hardware so that it places the lowest amount of
leverage and twist upon pannier stiffening plates and tubular frames. I
did not design the hook at the far left, but I did design the other
three, all of which are quite short to minimize the stress placed upon
aluminum plates and tubular frames. The low-impact hook design, coupled
with highly stable four-point mounting systems allows the use of
extremely lightweight relieved aluminum stiffening plates to be used in
RBD and ATS panniers. The king of hardware is the hand-made brass
fastener on the right that is used in Hummingbird IFT panniers. It
weighs 1/7th the amount of the vinyl coated hook on the far left (used
in RBD panniers from 1982-1995). When secured in place on ATS
Hummingbird racks, in four widely spaced places at the top and bottom,
it will be locked as tightly as a handlebar stem holds a handlebar,
producing an unparalleled combination of strength and stability at an
absurdly low weight (2 grams, 1/14th ounce). (PERFORMANCE ADVANTAGE)
Rack Platform Designs
Top Platform Designs
The top platform of a touring rack has had two simple, basic functions traditionally, and that is to support gear attached to it (sleeping bag, tent poles, sleeping pad) and it is the place from which panniers have been hung (attached). In high-performance racks the function and design of the top platform, and it's role in performance, is quite different. In advanced design, the top platform of a rack will directly have an impact in the weight reduction of the rack itself and indirectly in panniers. It's design will have a very important effect upon the lateral rigidity, and the overall rigidity, of the rack. The width of panniers will be determined, in part, by the width of the top platform of the rack. And, in a well-designed top platform of a rack, panniers will not merely hang loosely from the platform, they will be locked rigidly in place as part of a rack-specific mounting system.
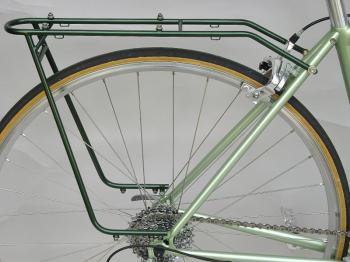
A custom-fit rack with a narrow (2.75") top platform, which is long to carry gear (sleeping bag, foam pad) most effectively in a longitudinal orientation. This unique, and very rigid rack design keeps rack weight low. This rack weighs less than 13 ounces.

A rear Hummingbird IFT rack mounted to a bicycle frame with an ATS Pivot-mount adjustable mounting mechanism. The top platform is narrow to increase the angle of the integrated triangulation struts in the side platforms of the rack.
The top platforms of Hummingbird racks are a good example, whether they
are rear racks or front, of how their unique design influences
performance. One means of increasing rack rigidity is through the
custom fitting of racks by extending the top platform of the rack into
the seat stays of a bike frame or to the fork crown of the fork. Both
front and rear Hummingbird racks are available in a custom-fit version.
In versions of Hummingbird racks, which are not custom-fit and a
Pivot-mount attachment mechanism is used in the rack-to-frame
connection, the top platform is lengthened, or extended to the
Pivot-mount as far as possible to maximize the rigidity in the top
platform. Regardless of which of the two designs is used in
rack-to-frame connections, both are much more rigid than in all of the
common rack-to-frame connections found in other racks.
The most critical means of increasing rack rigidity in high-performance racks, like ATS racks, is through triangulation in the sides of the racks. It's a design function, not a material one. The top platform of the Hummingbird racks is extremely narrow (2.0 in. inside width). When the vertical sides of the rack are connected to the very narrow top platform, a design of steep triangulation is the result, as the triangulation struts are, in essence, integrated into the sides of the rack. The narrower the top platform, the greater the degree of triangulation. The top platform is also very narrow to increase the angle of the flare of the side platforms in the rack to about 10 degrees. The high angle of flare allows rear panniers to clear the rear derailleur of a touring bike. When there is no pannier/derailleur interference panniers can be designed to be longer and narrower.
Hummingbird rear racks are built in a version in which the top platform has parallel sides and also in one in which the top platform is in a long wedge shape. The wedge shape is used on bicycles in which the pathway between the Pivotmount mounting tubes in the rack, and the rack mounting fittings on the seat stays of a bicycle, are blocked by a brake. When a brake proves to be an impediment to mounting, a wider rack (just the front end is wider, creating a wedge-shaped platform) and Pivotmount mechanism are used to forge a path to the rack mounting eyelets on the frame. But regardless of the shape of the top platform, wedged or with parallel sides, it is always quite narrow. A narrow platform eliminates any need for cross tubes that would normally be part of the platform to keep gear fixed to the top of the rack from hitting the bicycle tire directly below it. Removal of cross tubes is one of the two ways in which nearly a half a pound of weight is eliminated in the Hummingbird racks. (PERFORMANCE ADVANTAGE)
Touring Rack Side Platform Designs
One of the most basic, elemental functions of a touring rack is to provide a design that is compatible with the mounting system of panniers, that affords the means by which panniers may be mounted in an extremely secure way. For panniers to be mounted in a rigid manner, they must be secured both at the top and bottom with widely spaced hooks or fasteners, ensuring that the mounting system is movement-free (no springs, bungee cords etc.). To develop movement-free mounting, the side platforms of racks must be designed specifically to accommodate the lower hooks or fasteners of panniers. Such a design provides compatibility with pannier four-point mounting systems, in which the more widely spaced both top and bottom pannier mounting hooks and fasteners are, the better.

An RD/EX Hybrid Rear Rack. This rack has two flat areas in the lower part of the side platforms in which to mount lower pannier hooks. Another version of this rack is available to be used in conjunction with 18" panniers. That version eliminates the hook-mounting tube near the bottom of the rack, and the side platform design is altered to created wider hook spacing at the bottom of the rack. Rack weight is reduced to under 18 ounces in the custom-fit version designed for 18" panniers.
For racks and panniers to perform well as an integrated system, the side
platform of a rack must have a flat area in its rack tubing or rod, at
the top and bottom (or near the bottom), in which the lower fasteners in
a four-point pannier mounting system can be rigidly attached or
mounted. The wider the flat areas are, the better. Such a design is not
only an integral part of, but is executed to a much higher degree, in
all ATS racks (the flat area in Expedition Hybrid racks is 9"). This is a critical feature of rack design which almost all
racks lack.
At first glance it may seem that the design of rack platforms is not all that crucial, but how they are designed in relation to pannier mounting systems will have a considerable impact on the handling characteristics and performance of a touring bike, especially in rough riding conditions. Both pannier/rack stability and strength can be greatly enhanced, and the weight of panniers can be reduced considerably, through a rack side-platform design that contributes to effective four-point pannier mounting. Increased stability and weight reduction both improve the performance of touring bicycles.
(ATS, RBD PERFORMANCE ADVANTAGE)
Innovative and Symbiotic / Minimalist Side-Platform Design
ATS Hummingbird racks are very unique in that their side platforms are designed specifically to reduce, to an absolute minimum, the amount of tubing that is used in their construction, while still providing the highest rack rigidity and the very best pannier mounting stability, at the lowest possible weight. There are several keys to the greatest/least combination of stability and low weight and to the minimalistic design of the rack side platforms.
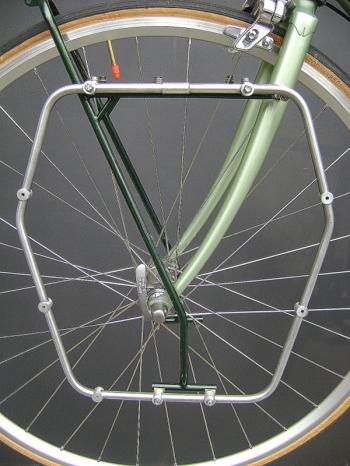
One of many types of minimalist side-platform designs used in Hummingbird IFT racks. The internal aluminum pannier frames increase the rigidity of the racks. This is a Hummingbird IFT Front Mid-Mount Rack with a four-point mounting design.
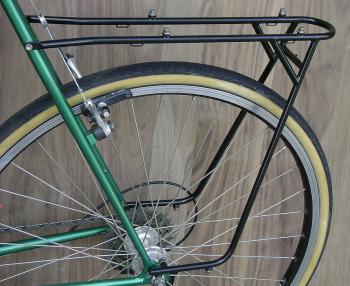
A custom-fit Hummingbird IFT Rear Rack with another type of minimalist side-platform design. I no longer use such large corner braces. I now use much smaller braces that only weight 4 grams (1/7th ounce).
Hummingbird racks are carefully designed to utilize the structure of a
bicycle's forks and stays through extremely rigid and very direct
rack-to-bike connections. In addition, the racks are very steeply
triangulated to create the highest levels of lateral rigidity in the
extremely lightweight racks. These two factors provide a very stable
foundation of stability. But rack rigidity in itself is not nearly
enough.
Certainly equal in importance, and maybe of even greater importance, are the integrated rack mounting fasteners brazed into the tubing of all ATS Hummingbird racks at the top and bottom of the racks. These custom-designed fasteners are highly complimentary with the unique design of the aluminum internal frames in Hummingbird IFT panniers. The brazed-in fasteners perform a crucial function in a symbiotic design which creates the ATS Hummingbird rack/pannier Ultra-Lock Mounting System. The custom fasteners provide an extraordinarily rigid means of mounting the tubular aluminum internal frames in the rear side of the panniers. This highly rigid mounting develops the means by which the exceptionally lightweight Hummingbird racks may utilize some of the structure of the tubing of the pannier internal frames, which augments their own structure. Utilizing the structure of the pannier internal frames increases rack rigidity and strength. At the same time, the aluminum pannier frames utilize some of the structure of the racks: symbiosis. The effectiveness of this design contributes to great reductions in rack and pannier weight. ATS Hummingbird chrome-moly tubular steel racks may weigh less than 9 ounces and ATS Hummingbird IFT panniers weigh as little as 18 ounces per pair. (ATS PERFORMANCE ADVANTAGE)
Certainly equal in importance, and maybe of even greater importance, are the integrated rack mounting fasteners brazed into the tubing of all ATS Hummingbird racks at the top and bottom of the racks. These custom-designed fasteners are highly complimentary with the unique design of the aluminum internal frames in Hummingbird IFT panniers. The brazed-in fasteners perform a crucial function in a symbiotic design which creates the ATS Hummingbird rack/pannier Ultra-Lock Mounting System. The custom fasteners provide an extraordinarily rigid means of mounting the tubular aluminum internal frames in the rear side of the panniers. This highly rigid mounting develops the means by which the exceptionally lightweight Hummingbird racks may utilize some of the structure of the tubing of the pannier internal frames, which augments their own structure. Utilizing the structure of the pannier internal frames increases rack rigidity and strength. At the same time, the aluminum pannier frames utilize some of the structure of the racks: symbiosis. The effectiveness of this design contributes to great reductions in rack and pannier weight. ATS Hummingbird chrome-moly tubular steel racks may weigh less than 9 ounces and ATS Hummingbird IFT panniers weigh as little as 18 ounces per pair. (ATS PERFORMANCE ADVANTAGE)
Rack Triangulation and Flare
Rack Flare
The side platforms of all RBD and ATS racks are angled inward toward the top platform ( or conversely, outward toward the bottom of the rack). The angle in RBD Expedition racks is 4.5 or 6.0 degrees. This angle of flare allows panniers to clear hub quick release skewers when panniers are mounted. The degree of flare in RD/EX Hybrid racks and Hummingbird racks is as high as 10 degrees. This angle is critical in that it creates both triangulation, increasing lateral rack rigidity, and it also allows long panniers (18 in.) to clear the rear derailleur of a bike when mounted, lowering the center of gravity of the gear carried on the bicycle. (PERFORMANCE ADVANTAGE)
Integrated Triangulation Struts
Triangulation in racks is, as I've mentioned, very important. It provides rigidity through design opposed to developing rigidity through the use of a heavier, and more rigid tubing or rod. It is one of the principal designs in Hummingbird four-point rear racks that allow them to be as lightweight as 11.5 ounces and still maintain a very high degree of lateral rigidity. Hummingbird and RD/EX Hybrid racks have triangulation that is integrated into the side platforms of the racks and ATS Expedition Hybrid racks have triangulation struts that are separate from the side platforms of the racks. Separate struts are brazed to the side and top platforms and create a 10-degree bridge between the two. ( ATS PERFORMANCE ADVANTAGE)
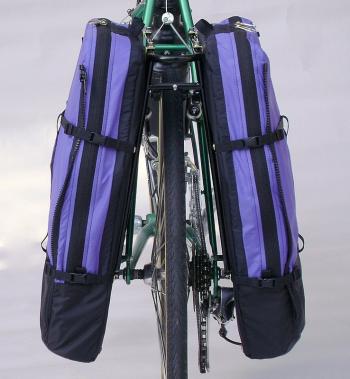
Triangulation, and its relationship with panniers in a rack/pannier system is probably most easily illustrated in a photo from the rear side of a touring bicycle. The triangulation struts integrated into the side platforms of the racks develop 10 degrees of rack flare. The flare allows panniers to be mounted outside of the rear derailleur.
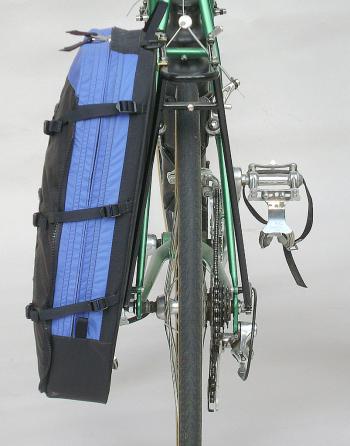
Long panniers may be used most effectively when racks are properly flared. This allows long panniers (in this case, 18") to be used, and at the same time it allows panniers to be made more narrow. One way to figure out if rack designers are clueless, or not, is in noting the whether their racks are effectively flared. Most racks have no flare, although this design has been around for decades.
Dual Triangulation
One of the great, and pleasant, shocks that I've experienced as a designer came when I was building my first Hummingbird Mid/Low front racks. The first to be built was a three-point pannier mounting design. There isn't much to it, and it weighs less than nine ounces, yet it is extremely rigid. It is more rigid than seems possible, but it is as rigid as it is for a couple of reasons. It has triangulation into both mounting points on the fork, or dual triangulation (vertically and horizontally), and it is mounted directly to forks with no clamps or flexible connectors. (PERFORMANCE ADVANTAGE)
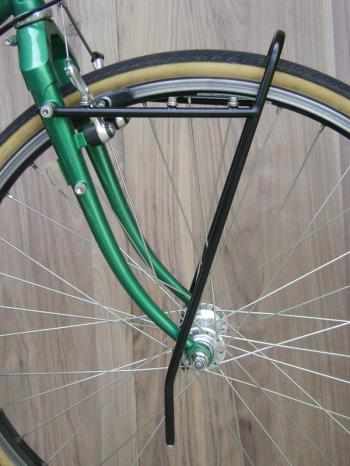
An early Hummingbird IFT Front Three-point rack with a mid-mount pannier-mounting design. When I built the first version of this rack in 2004 I was truly stunned by how rigid it was. It didn't seem possible, but it was through custom, direct-to-fork mounting, dual triangulation and rigid steel tubing that a rack that weighs less than 9 ounces could be so incredibly solid.
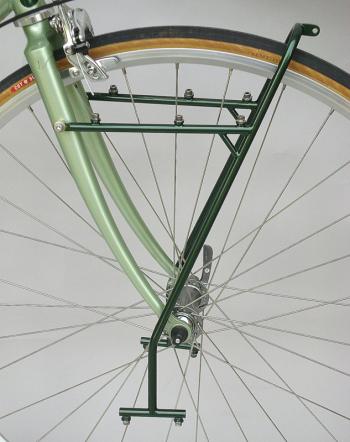
I went on to build better designs, and as I so often do with lightweight gear, I added weight to provide better overall performance in rack/pannier systems.
Rack Mounting Designs and Mechanisms
Rigid Connectors
The Mid-Mount Hummingbird IFT Front Rack in the photo is extremely rigid. When I built this rack I purposefully did not mount it directly to the low-mount fitting on the fork blade as I wanted to use the rack as an example. I didn't custom fit the rack because when customers purchase this rack, unless I have their frame in hand and can custom fit it when build it, it will be mounted just like the rack in the photograph. It will be very close to a custom fit, but I will use a small fitting designed as an adapter in mounting the rack. The rack, although it is minimalistic in its design, is very, very rigid. It is quite rigid because of dual triangulation, but it is also rigid for another reason. The small connector that I made to mount the rack to the fork fitting is machined out of a material that is more rigid than the tubing of the rack itself, and it is direct-mounted using no flexible connectors as virtually all other rack builders do. My rule of thumb when I'm designing adapters to mount non-custom fit racks is to always design the connectors so that they are more rigid than the rack tubing used in building the rack itself. ( ATS, RBD PERFORMANCE ADVANTAGE)
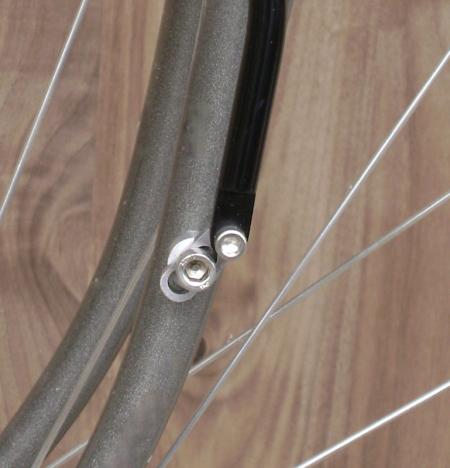
Whenever possible, I suggest custom, direct-to-fork or direct-to-frame mounting of racks. But when it is not possible, some type of very rigid adapter will be used to maintain an exceptionally high level of rack rigidity. No flexible connectors are ever used, as they are in virtually ever other type of rack.
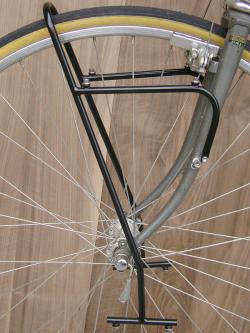
One of the most incredibly stupid ideas to come down the pike was the much-too-low mounting position of low-mount racks. A higher mounting position, as in the rack in the photo, simply allows panniers to be built much narrower within a given gear-carrying capacity, and at the same time it allows the bottom of the panniers to be very low. One of the many wholesale failures that developed in the often obscene, misguided commercialization of bicycle touring was the much-too-low mounting of racks.
Pivot-Mount, Non-Custom Mounting Mechansim
One of the design failures of racks, traditionally, is that they are not mounted very solidly. The most solid connection is a direct-to-frame custom fit using no flexible connectors. Almost all racks use very, very cheap flexible connectors that are stamped out of stainless steel flat-stock material. As most racks are designed to be cheap, and as performance and quality are not even given thought, flexible connectors are the norm. But there is a much better design, even when custom fitting isn't possible. The better method of making a rack-to-frame attachment is with a tubular connection, and through keeping the tubing used in the connection relatively short.
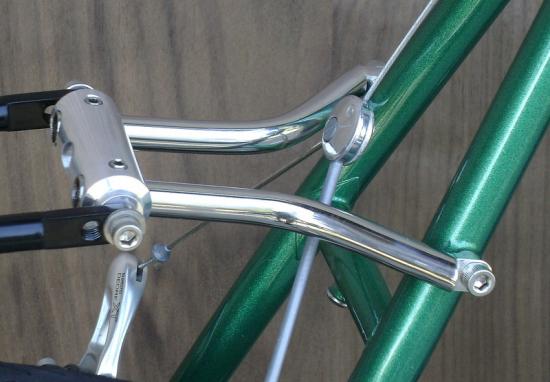
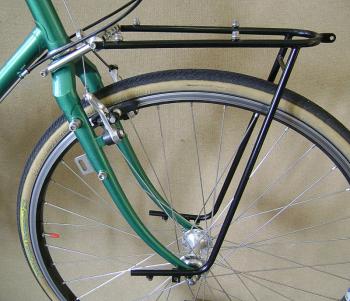
A Pivot-Mount mechanism being use to make an extremely rigid rack-to-fork connection on a Hummingbird IFT High-Mount Tandem Front Rack.
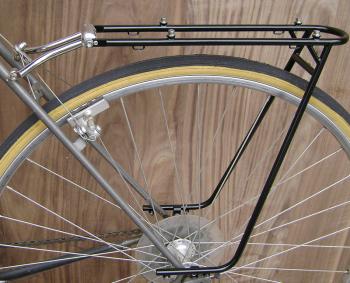
One of many types of Pivot-Mount mechanisms being used to mount a rear RD/EX rack.
When ATS front or rear racks, with a platform over the wheel, cannot
be custom-fit they are mounted to forks or stays by incorporating the
Pivot-Mount adapter system. The Pivot-Mount system is made in many
versions and is highly versatile in making rack-to-frame connections.
Normally, the spread of seat stay eyelets varies from about 1.25" to
3.5". The Pivot-Mount barrel is machined in many sizes (.125"
increments, laterally) so that the stainless tubes that project forward
from it to make the rack-to-frame eyelet connection creates an accurate
and extremely rigid attachment. Most rack fittings on forks and stays
will be located below the top of a rack. The Pivot-Mount mechanism
rotates to adjust the angle of the mounting tubes to make a perfect
rack-to-frame mount. The Pivot-Mount system is a set of highly
customized parts machined to the closest tolerances. It is
painstakingly hand-finished to the highest standards of bicycle
components. (PERFORMANCE/QUALITY ADVANTAGE)
Price for Pivot-Mount Mechanism: $195 (included in the price of a rack)
Price for Pivot-Mount Mechanism: $195 (included in the price of a rack)
Triple Mounting Positions for Front Mid-Mount Rack
ATS RD/EX Hybrid and ATS Expedition Hybrid Front Mid/High racks are available in three different designs to be mounted to a fork at a high, mid or low position of attachment. The high position is with a Pivot-Mount adapter to fork crowns and uni-crowns. In a mid-mount position, mounting is through a slotted plate to RBD rack fittings. In mounting the racks to low-mount fork fittings, the connection is made directly through a solid, custom-made plate or fitting that is custom drilled. The three different designs provide the most rigid mount possible at each location. My preference is to avoid mounting a rack, which has a platform over the wheel, to a low-mount rack fitting, but the system that I've developed ensures the highest rigidity when low-mount fittings absolutely have to be used. As an alternative to low-mount fittings I suggest a minor adaptation to fork crowns or uni-crowns, by means of a custom fitting at the rear side of the crown, to accept a Pivot-Mount system. It will make a front RBD mid/high rack more rigid. (PERFORMANCE ADVANTAGE)
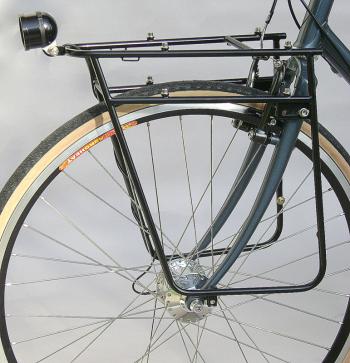
A very, very rigid direct-to-fork mounting of the RD/EX Hybrid Mid/High-Mount Front Rack is made by making the connection through a mounting plate high up on the fork blade.
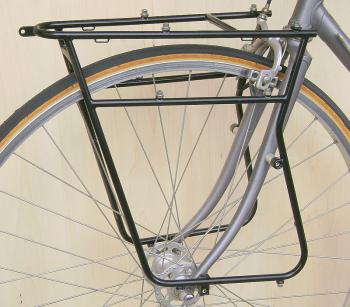
This is what I try to avoid: mounting a high-mount rack to a low-mount fitting. It can be done, obviously, and I've executed this type of connection in a number of ways. But a better way is to mount the rack to the fork crown using a Pivot-Mount attachment design or through custom fitting.
Rack Quality, Joinery and Custom Fittings
Fillet Brazing / Seamless Rack Joints
The term fillet brazing is somewhat ambiguous in that many people relate to it as a type of brazing, and it is. But more accurately and critically, it also defines an elaborate finish procedure in joinery, far more than a brazing process. In my racks it is an expression of fine craftsmanship in which each rack joint is brazed with brass or silver, and the built-up fillets that are made at each of the joints are then filed, shaped, sanded and blended into the rack tubing to create a very smooth, seamless joint.
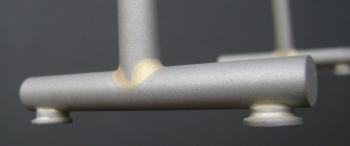
This is a photo of a brass fillet. I used to execute three separate levels of fillet-brazing quality. Now I only do one. This joint is a mid-level joint.
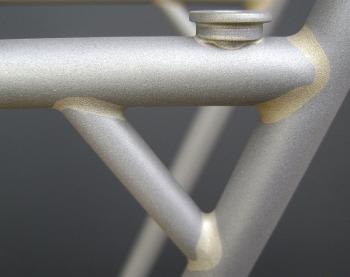
These are both brass and silver fillets. Some joints just seem easier to braze with silver. But in either case, a smooth and seamless joint is simply a part, among many, of quality execution.
Chrome Plated Racks
Most ATS racks are powder coated using a high-quality, dual-coat method, but some racks are plated using a special show-quality tri-chrome plating process (some racks are painted as well). There is no accurate, effective adjective that I can use to define the quality difference between ATS racks and other plated racks that are available, as the quality and finish differences are so extremely different. The only other well-executed plated racks (two of them) that I have ever seen were built by a friend of mine in the Midwest. The commonly available plated racks that I've seen are built and finished to some of the lowest possible standards.
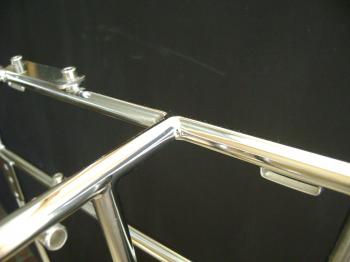
I simply don't own a camera that is capable of doing any kind of justice to the craftsmanship of this rack. It takes a much better camera than mine to deal with the extreme glare of a polished finish. Nonetheless, you can probably see, at least, that the joinery is solidly executed.
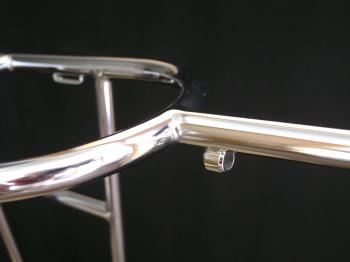
In my work I feel quite confident when going to my strengths, therefore I feel very comfortable with learning the hard way, which is probably my greatest strength. In the first plated racks that I built, I always applied what was most natural and comfortable.
To create a high level of quality in the craftsmanship of plated racks
is an extremely tedious, time-consuming process, and it is not a lot of
fun. When I prep and build racks for plating, every square millimeter
of the rack goes through a graduated process of sanding and polishing,
after it is systematically cleaned with Scotchbrite. After the initial
cleaning to remove the crud that is the residue of its production,
tubing is sanded with 180-grit paper and worked through various grits
until it is finished with 1000 grit. Then the tubing is very finely
polished to remove any sanding marks regardless of how extremely fine
they may be. (The extremely high luster in a top-quality finish is
achieved through prep polishing, not the plating material.) The same
process is applied to every custom rack fitting: strap guides, fender
mounts, mounting system fasteners, rack-to-frame-eyelet fittings and any
other custom fittings that are used in the crafting of the racks. Rack
tubing and parts are polished to a high luster before and after the
building of the racks. All rack joints are filed and then sanded using a
graduated method before polishing. Any place on a rack, especially the
hard-to-get-to places, that are not polished to a high luster will
appear a bit dull or even milky in color when plated.
The process may seem simple on paper, but it's not. A typical TIG-welded or brazed tubular steel rack that is crudely built may have an hour in production time, and sometimes dramatically less. ATS chrome-plated racks are generally built over the course of days, especially if they are complicated ones with lots of small fittings. And they don't always plate well. The one in the photos is a reject. It's a throwaway. It wasn't even close.
The process may seem simple on paper, but it's not. A typical TIG-welded or brazed tubular steel rack that is crudely built may have an hour in production time, and sometimes dramatically less. ATS chrome-plated racks are generally built over the course of days, especially if they are complicated ones with lots of small fittings. And they don't always plate well. The one in the photos is a reject. It's a throwaway. It wasn't even close.
Strap Guides
A very handy aid in strapping gear to the top of ATS racks in the tightest, most secure way possible, are the strap-guide fittings that I custom-make to hold gear-mounting straps in place. The guides conveniently hold straps while gear is being tied down to the top rack platform. I make strap guides in several different sizes, but the standard these days is for the very lightweight 7/16" webbing that is used in the compression systems of Hummingbird panniers. Guides are a custom option. (PERFORMANCE ADVANTAGE)
Price: $75 per set of four.
Price: $75 per set of four.
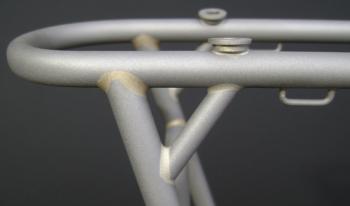
Strap guides in the raw. So many fittings have to be completely custom-made, and strap guides are one among the 100, or so, that I make to bring a special dimension of performance into bicycle touring products.
These 1/2" guides are far from essential, but like so many other small details, these little fittings are nice to have.
Custom Head light / Taillight Fittings and Designs
I've designed many types of custom fittings for single headlights, dual headlights, lamps that rotate up and down and swivel from side to side, as well as lights on extensions and lights that are tucked underneath the platforms of the racks. The list of light-system fittings that I've custom-designed is quite extensive. The number of custom parts, just for lights, runs into the dozens. The machining and fabricating of such fittings is one thing that is an important part of being a custom builder, and is one of the many types of custom rack work that I offer. (PERFORMANCE ADVANTAGE)
Price of fittings and designs: $45 and up.
Price of fittings and designs: $45 and up.
You'll have to excuse me, but I just haven't taken any specific photos of lighting system fittings or designs recently. I'll have to drag out some old photos, before my digital age began, of racks with dual headlamps and such. I think that there is actually a group of four custom fittings that I designed and made for this headlight that allows it to be rotated up and down and from side to side.
Website created by Imagine Web Design. Design of this website ©2013–2026.